In this series on RESTful Web services, we’ve been learning how to implement both a RESTful Web Service and client component using Node.js, Express.js, and JavaScript. The first three installments focused mainly on the server-side Web Services code. Now it’s time to shift our attention to the client-side of the equation, i.e., the consumer of our service. RESTful services are stateless so that any client that utilizes the HTTP protocol can access the data. The client can be a Browser, Native application, IoT device, or any other technology that supports the HTTP or HTTPS protocol. Since we are working with JavaScript, it only makes sense that we employ a browser to access our service.
Displaying Object Data
In Supporting CRUD Operations, we fetched object data via HTML links. That worked well enough, but the data was not processed on the client-side in any way, so that the JSON data was displayed in its raw form:
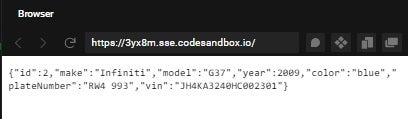
Let’s update the index.html page to display the vehicle data in a more meaningful way.
To begin with, we’ll create a whole new index.html file where the links point to the server that we created in the Supporting CRUD Operations tutorial. Here’s the markup for that so far:
<!DOCTYPE html>
<html lang="en">
<head>
<!-- Required meta tags -->
<meta charset="utf-8" />
<meta
name="viewport"
content="width=device-width, initial-scale=1, shrink-to-fit=no"
/>
<title>RESTful Web Services Demo</title>
<script
src="https://code.jquery.com/
Important: if you did not enable CORS on the server, you will get a “CORS header ‘Access-Control-Allow-Origin’ missing” error when you contact the server on a different domain. The following code lets the server tell the browser it’s permitted to use an additional origin:
const cors = require('cors');
app.use(cors());
Next, we’ll intercept the link navigation and call the server endpoint via AJAX so that we can remain on the page and display the vehicle data in a form:
$(() => {
$('#getterLinks a').click(evt => {
evt.preventDefault();
const link = evt.target.href;
// clear the form
$("#vehicleForm :input").val("");
$.getJSON(link, (data) => {
$("#vehicleForm :input").each((index, elm) => {
const $elm = $(elm);
$elm.val(data[$elm.attr('name'
Here is the markup for our form:
<form id="vehicleForm" action="https://5t6ml.sse.codesandbox.io/vehicles">
  <div class="form-group">
    <label for="id">ID</label>
    <input readonly class="form-control" name="id" />
  </div>

  <div class="form-group">
    <label for="make">Make</label>
    <input class="form-control" name="make" />
  </div>

  <div class="form-group">
    <label for="model">Model</label>
    <input class="form-control" name="model" />
  </div>

  <div class="form-group">
    <label for="year">Year</label>
    <input class="form-control" name="year" />
  </div>

  <div class="form-group">
    <label for="color">Color</label>
    <input class="form-control" name="color" />
  </div>

  <div class="form-group">
    <label for="plateNumber">Plate Number</label>
    <input
      class="form-control"
      name="plateNumber"
    />
  </div>

  <div class="form-group">
    <label for="vin">VIN Number</label>
    <input
      class="form-control"
      name="vin"
    />
  </div>
</form>
As it happens, I mapped the form field names to those of the JSON object so that we can simply iterate over each to fetch the corresponding JSON attribute:
$.getJSON(link, (data) => {
$("#vehicleForm :input").each((index, elm) => {
$elm = $(elm);
$elm.val(data[$elm.attr('name'
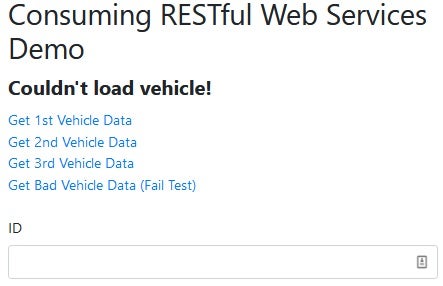
Displaying Messages to the User
Sometimes it’s not enough to set the form contents. For updates and exceptions, you will want to notify the user of success or failure. We’ll add a label above the form for that purpose, along with a function that sets the message:
<style>
  #lblResults {
    font-weight: bold;
    font-size: 1.4rem;
  }
</style>

<h2>Consuming RESTful Web Services Demo</h2>
<label id="lblResults"></label>
In addition to setting the label value, the showUserMessage() function, shown below, also clears the message after 5 seconds, so that the message is only shown while it is relevant to the previous action:
$(() => {
const $lblResults = $('#lblResults');
const $buttons = $(':input[type="button"]');
const showUserMessage = (msg, disableButtons) => {
$('.container').get(0).
Now we can call showUserMessage() from our AJAX success and failure handlers:
$.getJSON(link, (data) => {
$("#vehicleForm :input").each((index, elm) => {
const $elm = $(elm);
$elm.val(data[$elm.attr('name'
In a real application, one might set different classes on the message label to distinguish errors from success notifications, but that’s beyond the scope of this article.
Modifying Object Data
This time around, form fields – with the exception of the ID – are editable, so we can update their values in place. When we’re ready we can submit the form contents by clicking a button that we can place at the bottom of the form:
<button id="btnUpdate" type="button" class="btn btn-primary" disabled>Update</button>
The button click invokes the following handler:
$("#btnUpdate").click((evt) => {
const form = evt.target.form;
const id = $("#vehicleForm input[name=id]").val();
$.ajax({
url: `${form.action}/${id}`,
type: "POST",
data: $(form).serialize(),
success: (data, textStatus, xhr) => {
showUserMessage('Vehicle successfully updated.', false);
},
error: (xhr, textStatus, errorThrown) => {
showUserMessage(xhr.
Deleting Object Data
Rather than delete a specific vehicle, as we did previously, now the Delete button applies to whatever vehicle is currently displayed in the form. Here is the button markup:
<button id="btnDelete" type="button" class="btn btn-primary" disabled>Delete</button>
The code that invokes the API is very similar to that of the update, with two major differences:
- The HTTP request type is DELETE.
- The form contents are cleared after a successful deletion.
$("#btnDelete").click((evt) => {
const form = evt.target.form;
const id = $("#vehicleForm input[name=id]").val();
$.ajax({
url: `${form.action}/${id}`,
type: "DELETE",
success: (data, textStatus, xhr) => {
showUserMessage(xhr.
Conclusion
And that concludes this series on working with RESTful web services in JavaScript. Here’s a demo that showcases today’s functionality: